Showing posts with label In the Kitchen. Show all posts

Thursday, August 26, 2010

Homemade Cupcakes?

I make these cupcakes...and I call them homemade. And every time someone eats them they groan with delight and ask for the recipe.  And I'm honest with them and tell them that I use a cake mix.  But it's a darn good cake mix...premium (it says so on the label).  But the real trick is not just in the cake mix, it's in the homemade icing.  Delicious buttery chocolatey finger licky frosting that takes all of about five minutes to whip up...because that's the kind of homemade I like to do.

And yesterday after lunch my little guy and I were in the mood for something sweet. Yellow cupcakes with homemade chocolate frosting made his eyes twinkle so we decided to make them right then and there.  I dumped one full pan of them upside down into the oven when I burned my finger trying to take them out....a tragic loss.  But, we did get a dozen and I felt like sharing them with you.  And since you can't taste them through this screen, I'll tell you how to make them too.

First, you must buy the absolute best yellow cake mix on the market. 


The best, in my opinion, is


Duncan Hines Moist Deluxe Butter Recipe Golden
It says right on the box that it's Amrica's favorite...and there is good reason for that.  Everytime I use it someone comments on what good cake it is.

Prepare your cake mix as directed, spoon into cupcake liners.  Use two in each muffin cup and the outer liner will be pretty when your done.
 
Bake your cupcakes.  They will come out plain. boring even, but you'll still want to eat one...hold out.
 
While they are cooling prepare the frosting.  Here's what you need:


 and here's the recipe:

HOMEMADE CHOCOLATE BUTTERCREAM FROSTING
1/3 Cup butter (softened)
1/3 Cup cocoa
2 Cups powdered sugar
1 1/2 tsp vanilla
2 Tbl. Milk


Make sure that butter is softened first and then beat all the ingredients together with your mixer until it is creamy and smooth.

 
Then get out your pastry bag.  If you don't have one of these you can just pick one up anywhere that sells Wilton products.  I use this all the time and it's well worth the few dollars. You will also need a tip with a wide opening.  I used a number 199 tip.  You can see the basic shape and anything with a wide round mouth and a similar look should work.
 
Fill your pastry bag with frosting.
 
Roll up the end and grab your cupcake.

You are going to make one long continuous swirl starting on the outside of the cupcake top.
 
Go all the way around the outside and then do a circle inside that, and then inside that, until you have a swirly little mountain of pretty icing and then finish it off with a little spike on top. (if you've never used a pastry bag before it might take a little practice, but not much)

And there you have it.  Homemade (kind of) and completely irresistable.  Look at this thing. 


You want to take a bite right now don't you?  Here, I'll do it for you.


Wish I could sit down at the table with all of you and give you a glass of milk and one of these right now. But I feel better knowing that all you need is a good cake mix and five minutes to make homemade chocolate buttercream frosting and you'll have your own. And you will be happy.  Because cupcakes make people happy. Yum.


Friday, July 16, 2010

Experimental Cakes

My husband is the fifth of seven children.  By the time he came around there was no need to hire a babysitter if mom and dad had to go out.  There were older children to watch the younger ones.  I'm sure that many a great adventure was had when all the kids were left home to fend for themselves.  I doubt that I know even the least of them.  But, one thing I have heard about is their kitchen experiments.  When only the kids were home they would create "secret recipes"...aka crazy concoctions.  I imagine that the kitchen did not look pretty after these experiments.  And, my husband informs me that the recipes never turned out to be much good either.  But, it was good fun and he still loves to create his own masterpieces when he cooks.

With that in mind, today I decided to venture where I do not often go... I let the kids make their own experimental cakes. Anything goes.  They chose the amounts, proportions, and ingredients. Don't don't tune out on me mamas, it's not as crazy as it sounds, this was really fun.  Take a deep breath and tell yourself you can do this.  I gave them a little lesson before hand about what usually goes in a cake.  A cake always has:
Flour
Sugar
Eggs
Butter, oil, or some kind of fat
Leavening (like baking powder)
and some kind of liquid

I set those ingredients out on the table and with that, we set out into the unknown.  They looked so empowered as they debated on how much sugar they should add whether they had achieved just the right taste. 


They chose their components carefully. We even wrote down the recipes as we went along.

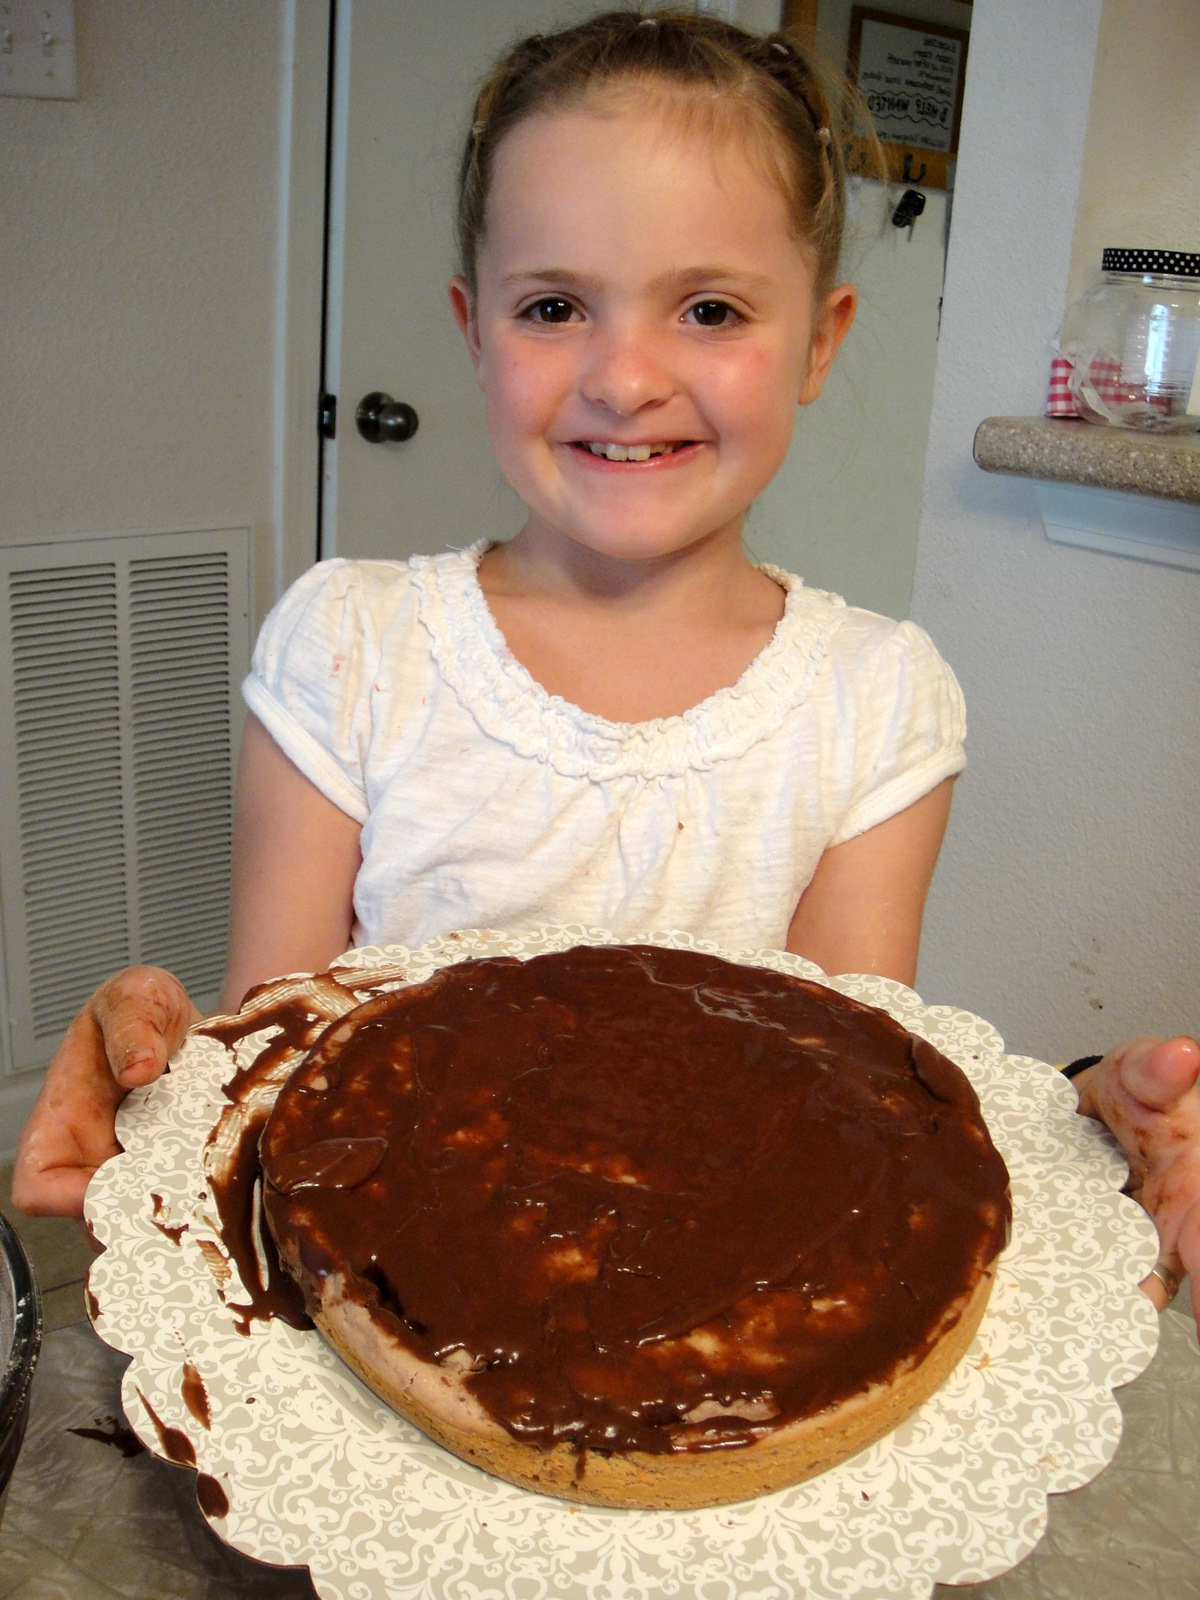
 My daughter chose to divide up her batter and  infuse each one with a different flavor (strawberry, coconut, and chocolate) and then layer the batters to try to make a neopolitan look.  I was impressed.

The batter was quite yummy, really it was.  We licked out fingers alot.

 I had serious hope that they may turn out to be Iron Chefs someday.  They could hardly wait until the cakes came out of the oven.  And when we got out first glimpse of them they looked......squished. 

Lovely but squished.  Perhaps the fact that each cake had only one egg?

After taking a look at the cakes we created our own icings, based again on the kids' ideas. 

Finally we all sat down to the table to sample their wares.  The first bite was, um, dense.  But come on, it was their first attempt at cake making. 

We each took a few bites and let them slowly mill around in our mouths before we helped them slide down with a glass of milk.  I tried to be positive.  "Thanks for helping me bake these cakes CHEF!" I said to my son.  He gave me a weird look and said
 "I'm no CHEF!  I'm weak! That was DISGUSTING!"


My wonderfully pleasant daughter tried to smooth over the situation.  "I tasted yours" she said to him "And I think it was...(I could tell she was searching for a polite thing to say that wasn't totally dishonest)  But, while she thought he filled in the blanks "AWFUL?"  he said.  "Maybe a little ROTTEN EGGY?"

I couldn't help it, I cracked up laughing.  The cakes were just not very good.  But we had a great time and they said they want to do it again..only with more eggs and....a little more research on cake making.  It tooks us a few hours to do this together and it was time well spent.  We talked and we learned things about baking and the kids felt important. It was the kind of afternoon that left us with happy, funny memories. So, the next time you are looking for something to do with the kids let down your guard a little and bake some experimental cakes.  Only, don't plan on serving them to company or anything.

Tuesday, July 6, 2010

Campfire Chocolate Eclairs

If I could choose any doughnut in the whole wide world, any at all, I would choose a chocolate eclair.  I love them. They are pastry perfection in my opinion. And though I rarely indulge in these creamy, gooey, doughnutty delights, I also pretty much never turn them down when an opportunity arises.  Unfortunately, chocolate eclairs just aren't available everywhere you go.  Sure, you can get one at the doughnut shop.  But, do they sell them for dessert at restaurants?  Can you get one at the gas station?  Do you have a recipe for eclairs in your old beat up recipe box?  Not usually, and so we are left with an aching desire to eat more of them.

I have another love, campfires.  I love the way they flicker and dance in the dark.  I love the way that they magnetically draw people to stand or sit around them and chat.  I love roasting things over them.  Marshmallows, hot dogs, cocoa...ahhhhh.

But, until now, my friends, I have never experienced the joy of campfires and chocolate eclairs at the same time.  But, brace yourselves....I found a recipe for CAMPFIRE CHOCOLATE ECLAIRS!  It's a match made in heaven.   Here's what you do:

Gather your supplies.  You'll need:

A campfire
A roasting stick (or aluminum tent poles or green sticks with the bark peeled off)
Vanilla Pudding cups
1 package Pillsbury Quick crescent rolls
A can of ready to spread chocolate frosting
Tinfoil

Wrap the aluminum foil tightly around the end of the roasting stick.  Form dough of crescent roll around foil to make a tubular shape.  The roll dough is shaped like triangles. I started with the big end and then kind of wrapped it around itself until I got to the small end.  Then I squeezed it just a little to make it hold together.


Now, for the roasting.  You must be patient even though it's a little exciting.   Cook slowly over hot coals.  You have to rotate often and make sure that you are not cooking the tip more than the rest.  Even and golden brown is the goal.  If you cook it too fast you will have a doughy center. It will take a few minutes.

Sometimes you have to squeeze the foil a little tighter around the stick in order to prevent it from spinning around on the stick when you rotate it.

OK, once the dough in nice and brown you can remove it from the foil.  I think it is a requirement that you have dirt under your fingernails when you do this.  At least that's what I was going for...camping authenticity.

Spoon it full of vanilla pudding.

Spread chocolate frosting on top and then...oops , I got so excited that I just went ahead and took a big bite before I took the picture.  But it was good...oh so good. 


Then after that I just didn't have time to stop and take pictures before I gobbled them down.  So, you'll have to try it out yourself.  You might want to plan a camping trip for the sole purpose of eating these.  Now, how can I make these in my own kitchen?  Any suggestions?

Friday, April 23, 2010

Go Eat Some Dirt

Yesterday was Earth Day and my little idealist decided to get her friends together and clean up trash at a local park to help save the earth. I don't recall ever doing anything like that when I was a kid.  Anyways, since I have never even thought about saving the earth on earth day I felt compelled to at least make an earth day treat for the girls who want to change the world to eat at their event.  I found this idea on the pioneer woman website a while back and thought it was perfect for a garden party, earth day, or any time.  I mean really, can dessert get any more adorable than this? I think not.

I made some modifications of the recipe that I found online based on:
1.The fact that Target didn't have all the things it called for
2.  I started this project about 90 minutes before our earth day extravaganza ( I always like to plan ahead like that) and there was just no time to go to two stores.

So here it is:
First, gather your supplies.  You need flower pots (I found these in the dollar bins at target), straws, OREO or other chocolate sandwich cookies, icecream, and some fresh cut flowers. (excuse the foil, I was going to use it but didn't)

Wash out the pots before you start.  Let your ice cream soften a little.  Not too much, we don't want soup.  Just let it become slightly easier to work with.
While the ice cream is softening get out your straws and cut them to the height of your pots. Just hold it up next to the container and snip.

Then put your cookies in a large ziploc bag and crush them (or you can use a food processor to crush them)

OK, now hold your straw up in the container and scoop some icecream around it until it is standing up on it's own. Try not to get any any ice cream inside the straw. (note:  online the put cake in the bottom and you could just poke the straw into it.  Probably a good idea but I had no cake and this worked fine)
Once it is in place you can fill up the rest of the container almost to the top.
Then, just sprinkle the crushed OREOS over the top generously to look like some nice dark soil.

Look at that.  You want to plant something in that don't you?
Now, put them back in the freezer and let the icecream firm back up.
I packed the pots in a cooler and when we got to the park we pulled them out.  The girls actually thought they were pots of dirt...I love stuff like that.  I gave them each a flower to plant in the dirt and when they got their pots they smelled the dirt and said "is this OREO cookies?!"  They planted their flowers by sliding the stem into the straw and then they dug in.
And after all that yummy dirt was gone they all wore the flowers in their hair...except the little brother who threw his in the dirt.
So easy, no recipe, no cooking, adorable, and lots of smiling children (with black OREOS stuck in their teeth!)  Try it out, your kids, and you (you know you want to eat that too) will love it.

Friday, April 16, 2010

Sometimes You Just Need Chocolate Chip Cookies

Sometimes you can't remember what you did at preschool that day except that you got sand in your shoes and you had to have a substitute music teacher.
And after you eat your lunch your stomach feels so full...but only full of food...it's not full of candy  or cookies at all.  So you make your eyes look as sweet as possible and you tell your mom about this lack of cookies in your otherwise full stomach.

And luckily your mom also has a place in her heart for warm chocolate chip cookies so she bakes some right then and there.

and puts them on a plate for you.

And they look so yummy that even she eats a few.

And because you had sand in your shoes and a substitute music teacher you really need to watch cartoons on the couch while you eat the cookies.

And luckily your mom bought the couch at a yard sale or she might have been hyperventilating that you had had hands that look like this:

And after about four cookies you start to feel so much better.

And you tell your mama that you love her.

And you pretty much forget all your troubles.

Because those were the best homemade chocolate chip cookies you have ever eaten. 
Really.
Your mom got the recipe from her friend who actually made the best cookies she'd ever tasted.
Here's the recipe. Go make some chocolate chip cookies for someone today.  It's like a little present...I promise they will smile.

P.S.  -I don't know what it is.  Maybe it's the JELLO pudding mix in the dough.  Whatever it is these are simply divine.  They're soft and gooey and not to greasy and not too dry and you want to eat so many that it makes you sick and...I've got to go eat another one now.

THE BEST HOMEMADE CHOCOLATE CHIP COOKIES...EVER 
2 1/2 cups flour
1 tsp salt
1tsp baking soda
3/4 cup sugar
3/4 cup brown sugar
1 cup softened butter (I use real butter)
1 tsp vanilla
2 eggs
1-5 oz package vanilla instant pudding mix (JELLO brand)
Chocolate Chips (milk or semisweet, I like semisweet)

Cream butter and sugars.  Add eggs and vanilaa nd mix well.  In a seperate bowl mix pudding mix, soda, and salt.  Add dry ingredients to wet ingredients.  Stir in chocolate chips.  Add flour bit by bit until texture is right (You should be able to roll dough into a ball in your hands.  If it is too sticky, add more flour.)  Mix well.  Bake at 350 degrees on an ungreased cookie sheet until edges are just browning (12-14 minutes depending on you oven and your elevation)

Yum. Yum. Yum.