Showing posts with label Rainy Day Activities. Show all posts

Friday, August 27, 2010

Imagination City

Every once in a while I can see that my kids would really love to do a project.  And, not just a little project. Something that totally engages them, something open ended and creative...something that that will cause thier mom to stop what she is doing and enter their world for a while.  A few days ago I could see it my sons eyes.  My four year old had asked me to play with him multiple times and I kept responding with "sure, right after I finish this..." or "just let mama clean up these dishes first and then..." I could see that he was needing some serious mom time. 

So, I stopped, looked him in the eyes, and said the thing that I knew would make him happy.... "Do you want to build a paper city with me?" His little eyes lit up because he knew what that meant.  It meant that we were embarking on an imagination project together that was serious business.  We've done this before so I knew I was devoting a good little part of the afternoon to this "paper city" but that was the point.  We both needed it.  So what is a paper city? It's whatever you want it to be.  It's imagination at it's finest.  It starts with a pile of paper, some sharpies, crayons, scissors, and tape.

 Then, we ask the question  "so what do you want in your city?"

This time my son started out with fish.  He wanted a fish pond in his city.  He drew some fish and then I cut them out for him. 

 Soon we were creating skyscrapers from posterboard and a zoo for tiny  paper animals.

We folded the bottom part of the paper to make a little ledge so that we could tape the pictures down and they would stand upright.


 He was creating storylines and we kept on drawing and cutting and taping.  When my daughter arrived home from school she jumped right in and made some houses and a school.

 We even constructed this bus with teeny tiny people in it.


 Then, when my husband walked in from his run he sat down on the floor and drew a football field and a stadium...and a golf course (the dream city :)  We were on our way to making a two headed man (don't ask me...I just cut the stuff out) and some other people who  lived in the city but eventually it was time for dinner and homework. 

I felt happy looking at our little city as I made dinner.  It was a little momento of an afternoon well spent.  I had talked and listened and laughed with my kids and that good lookin' imaginary city was a symbol of our time together.  And after all the kids were in bed I heard little footsteps coming back down the stairs.  Then I saw a messy haired child poke his head around the corner and say "Mom....don't throw away that paper city OK?"  I smiled and agreed (I usually end up keeping them for a few days to a week until the novelty wears off)  Then, in a few months we will be ready to create a new, and totally original Imagination City.  What a great day.

Try it out.  It's quite a relaxing way to spend some one on one time with your kids.

Monday, June 7, 2010

Sock It To Me

Since we spent the greater part of last week sick we had to think of something to do with ourselves. My older kids can play games, read books, do puzzles, and watch movies.  But, my toddler is a whole different story.  When we play board games she sits in the middle of the board.  When we read books she tries to pull the book out of my hands or unloads the bookshelf while we read.  When we watch movies, she finds her way to the kitchen and unloads the garbage can.  The point is, we needed something that fit the following criteria:
1.  My toddler couldn't ruin it or distrupt it
2.  My toddler could participate and feel like we weren't ignoring her (and therefore not get into any trouble while we were doing it)
and
3.  Everyone who wanted to could lay on the couch and still have a good time.

We came up with a few things.  The first one was a little game called "Sock it to Me".
You'll have to forgive the photography.  It's about as clear as my foggy thinking was that day.

You'll need:
Washable tempera paints
paint brushes
paper and pencil
socks

Here's what we did:
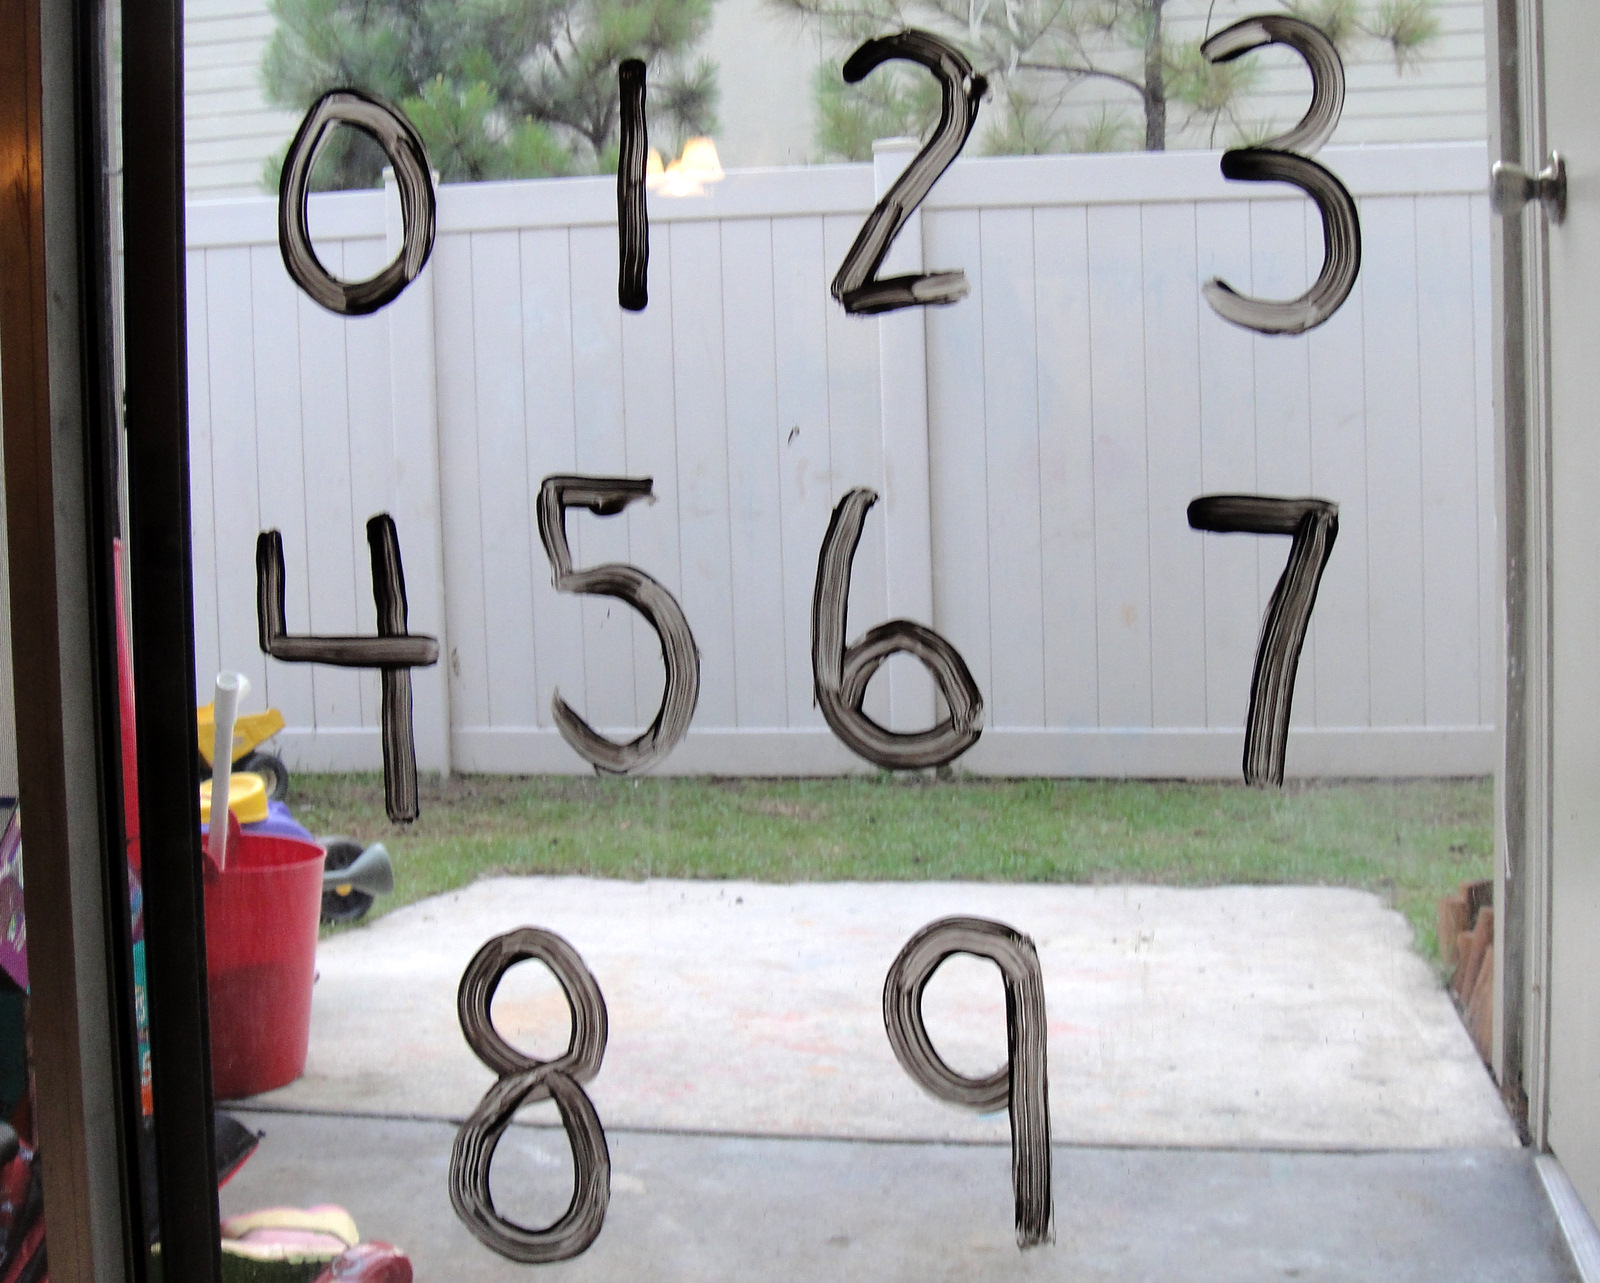
I got out some washable tempera paints that I already had in the closet and painted a target on the window.

I also painted the numbers zero through nine on another part of the window and printed out a sheet of paper with those numbers on it also.


The kids gathered their socks from their drawers (or what socks they could find.  I think we have more unmatched socks than any family I have ever met.  Nonetheless, we did find a little pile of nicely matched and balled up socks) and brought them downstairs.  Then we took turns throwing our socks at the window. (I know, we're easily entertained.  But trust me, this was actually fun)

For one game we had to try to hit each number on the window.  When we hit one number we could mark it off on our paper.  We kept taking turns until everyone had hit all the numbers.


For the other game we each got ten throws to see how many points we could hit on the window target.

And, the best part was that my toddler just ran around throwing socks at the window and feeling totally involved and it didn't ruin our game one bit.  She could retrieve socks for me while I layed on the couch :) (no, I don't do that all that time but on this day, yes) Plus it released some of our cabin fever and pent up energy.  Even sick kids need to move a little sometimes.

So, the next time you have a rainy day or a sick day try painting a game on the windows.  Then, grab your socks and go wild.

P.S.- It just washes off with a little Windex

Saturday, May 22, 2010

Shadow Puppets

Well, its the end of the week and I finally got around to posting about the shadow puppets.  If you didn't see the giveaway that I had last week here's a recap:

We invited our friends over for a shadow puppet show night one weekend.  We made everything we needed for the show in the hour and a half before they came. The kids made up their own plays and the parents cracked up laughing.  It was great entertainment and the kids can't wait to do it again.  The end.

 These puppets are fun for a rainy day, a quiet night with a flashlight (remember using your hands to make shadows on the walls, well this is like the upgrade) or for a full on shadow show night with friends. 

Here's what you need for the stage:
1. A cardboard box and something to cut it with
2. A white bedsheet (low quality is actually better here, you don't want it too thick)
3. A bright light source.  A really good flashlight will do.  Or, if your flashlights are kinda wimpy we have even used a lamp. 

For the stage we just used a regular cardboard box.  We cut it down one side (so that we could lay it completely flat) and then cut a window out of the front to be our stage.  Then we propped it back up and used some duct tape to secure it.  All that was left was to cover it with a white sheet and put our light behind it.  When we turned out the lights it looked like this:
And then with the puppets behind it it was like this:


So, now you want to make some puppets don't you?
Here's what you need for that:
1. Black construction paper (I used scrapbook paper because I had it on hand and it was sturdier)
2. Self sticking laminate (this is optional but you puppets will last much longer if you use it)
3.  Straws to use as sticks for the puppets
4. Brads ( I used one inch brass plated fasteners from Office Depot)
5. An EXACTO knife to cut out things like eyes
6.  Scissors to cut out the shapes

Oh, and of course you need some puppet templates.  You can draw your own and we have done that for things that we couldn't find templates for online. But, honestly, I like to use things that are already made and cut out some of the work. 
 I found this site with great templates so we only had to come up with a few of our own.  Go to:

for all kinds of stuff that's ready for you to print.

Now, stick your laminate onto your paper. (Here's the laminate I used, there will be instructions on the package)  It's pretty much just a big clear sticker that you put on the page.
Lay your template over the top of the laminated page and with a pen trace the entire thing (including the dots that show where the brads go).  Press firmly. 

The goal here is that when you lift the template off you will have left an impression on the paper like this:
And now you can use those lines as your guides to cut out your shapes.
Cut out the shapes. Use a hole punch to punch holes in the joints that were designated on the templates (you should have left a dot on these spots.


Hook the pieces together with the brads.

Cut out the eyes with your EXACTO knife

Then tape a straw to the back of each puppet and you're done! 

You can make this super simple and make puppets that are not jointed or laminated but a little extra time brings the fun up a notch.  Then send your puppeteers behind the stage, turn out the lights, and pull up a chair.
You will love it I promise and if you take the extra time to laminate them in the beginning you can use them for many many nights of fun together.  Try it out...just one more thing to do together besides watch TV.


Thursday, May 20, 2010

Salt Water Taffy Sculptures

The other day my husband was reminiscing about his childhood and the long summer roadtrips they would take to grandma's house.  Seeing as they had seven children and no car DVD players, they had to think of something to do.  He said they would sit in the back seat with a bag full of salt water taffy and make sculptures.  Ten years of marriage and I've never heard of this before...but I was interested.
He went on to explain that taffy is the perfect thing to make stuff out of because:

1.  It comes in a variety of colors perfect for making something cool
2.  It's pliable and just a little sticky so it's easy to work with
3.  You can eat it when you're done

Genius, I tell you.  I love this man.

So, as you might have guessed, the next time I was in the candy aisle at the grocery store I had to get a bag of taffy.  A whole bag of salt water taffy is only $1.15 and I couldn't wait to try it out.

After lunch today we whipped out the bag of taffy and started creating.  We (my four year old and me) started out with a zebra.

 We added grass, a pond, a duck, some trees,

and then a lion.


Then my husband came home and on his lunch break and made this:

He's obviously more experienced than we are.  Don't worry, you can be this talented at taffy sculpture too, it just takes time and dedication ;) Overall, it was a hit. In many ways much better than playdough because it's...well...yummy.  And, you have so many colors to work with.  The only tools we used besides our hands were some toothpicks to poke holes for eyes, etc.
 So, try it out.  It's cheap and it may just unleash your inner artist.

Monday, May 3, 2010

Make Your Own Toys

Yesterday it rained. It was dreary and soggy and drab.  And quite honestly I felt like I might lose my mind if we had to just sit inside the house all day milling around.  But, there really was no where to go. It was one of those days where the toys in the house seem dull to the kids and the minutes seem to drag on. I had to think of something. 
Luckily, something came to me.  I thought about some of the Little House on the Prairie books that I've read to my kids.  Back in the old days they had to make their own fun.  They made dolls from corn husks and balls from pig bladders...but wait, I didn't have any pig bladders lying around the house.  Darn. 
But the point is that they made their own toys from what they had.  So, I sifted through my messy hall closet and found all kinds of stuff that we could use to make our own toys. String, clothespins, rubberbands, some dryer vent tape, bent up pipe cleaners, some old birthday balloons, etc. The kids retrieved the recently emptied tubes from the toilet paper and paper towel rolls and were in business. Here's some of what we had to work with:
These pipe cleaners had obviously been particpants in previous projects.  They looked loved.
I even found some googly eyes.  I love googly eyes.  If you don't have these on hand, well, you should think about it.

I got out the trusty old hot glue gun and explained the concept.
I told the kids that we weren't trying to make and arts and craft project.  We were making our own toys.  They could use any supplies that we had availabe in the house and the goal was to make something that they actually wanted to play with.  And with that, we got started.
I took us a minute to get the juices flowing.  We made a paintbrush.

and an ice cream cone.
And then the inspiration starting coming.
How about a thunder monster!
We spooned rice into balloons,
 blew them up, and then tied them all together with yarn.
After adding some googly eyes and drawing some hair this monster was ready to rumble.  When you held onto the string and shook him he roared a thundering monster roar. 

So, of course there was chasing involved.

Then, then...my husband came in and showed us how to make these:
Rubberband guns.  When you squeese that clothespin on the end the rubberbands go flying and children begin jumping up and down and giggling.

Then, without any creative prompting whatsoever, my daughter comes up with this:
a marionette puppet.

The inventions went on and on.  Three hours,(no I'm not kidding.  Really, three hours) later I had to force them to quit so that we could use the table for dinner.  Now, I'm not guaranteeing any three hour miracle every time you do this.  But, I do promise that you can come up with some cool stuff and have a great time on a rainy day...or a sunny day...if you'll dig through your stuff and try to make some new toys from what you already have. You'll be surprised at how resourceful you can be. Happy toymaking.